The Carvetii Guide to the Cafetiere
Arguably one of the simplest methods to brew coffee, the cafetiere (also known as the coffee press or french press) has been around for nearly 100 years. Some see it as old fashioned and shun its use, while others love it for its simplicity and familiarity. Watch the video for the basic method and then read our blog which goes into more detail.
Coffee Press or French Press or Cafetiere?
Though the brewing method might be simple, deciding on the best name to use is more complex! The contemporary specialty coffee industry seems to favour ‘coffee press’ but to reduce overuse of the term ‘coffee’ I have decided to opt for the more commonly used (in the UK at least) ‘cafetiere’.
History
The cafetiere was invented by Ugo Paolini and patented by Attilio Calimani and Giulio Moneta in 1929. It underwent several design modifications through Faliero Bondanini, who patented his own version in 1958.
Coffee Style
In a sense the cafetiere is one of the purest coffee brewing methods. No filters, no pressure, just the slow steeping of coffee in water. We refer to it as an immersion method of brewing as the coffee is immersed in water for a period of time.
Unlike drip or filter coffee, where the paper removes the oils from the coffee, the cafetiere gives you the full coffee drinking experience. You can expect a lot more body in the cup and you might also experience some fine coffee particles in the brew, particularly towards the end of the cup. It is this grainy finish which often divides opinion when it comes to the style of coffee produced.
Coffee to Water Ratio
Whatever brewing method you choose, it is always important to be as precise as possible with your coffee to water ratio. We will always weigh both the ground coffee and the water.
For a cafetiere you are going to need 75g of coffee for every litre of water.
Typically the smaller single serve cafetieres hold around 250ml water and we aim for 19g coffee, and we’ll use 38g in the larger two cup versions which hold around 500ml water.
The Grind
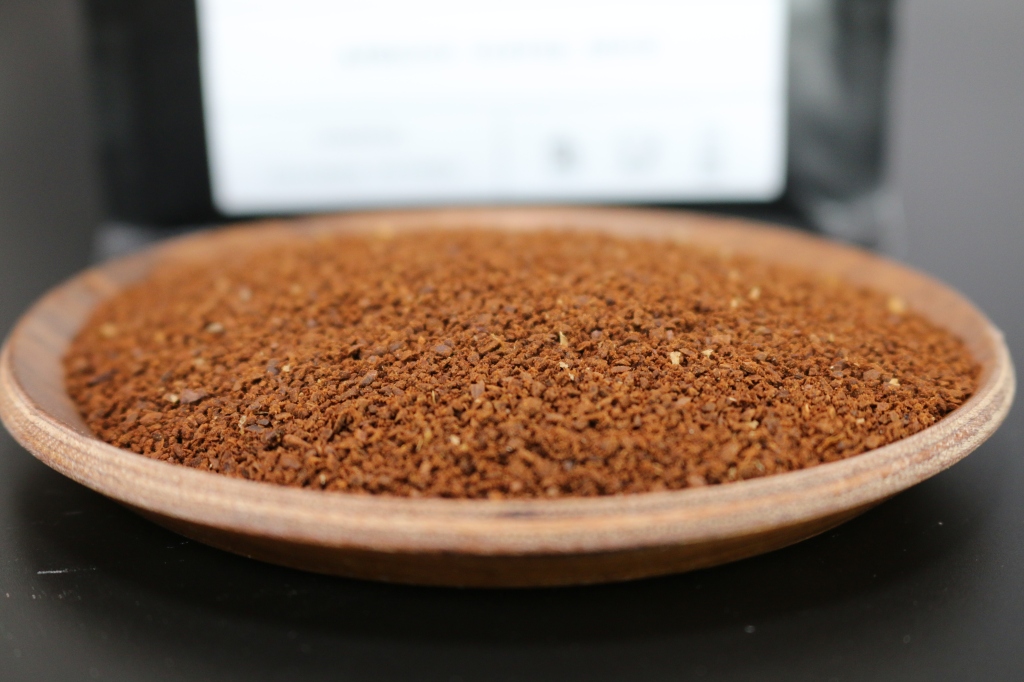
It is always difficult to describe the ideal grind setting for any brewing method. Ideally you will build up this knowledge with experience. Typically a good starting place is a grind size somewhere between caster and granulated sugar.
The size of the grind will ultimately determine how quickly the coffee brews. If you have ground the coffee too fine, it will brew quicker and you are likely to experience over extraction – the coffee will have a bitter finish, often leaving you with a drying experience on the tongue.
Similar to brewing tea, over extraction is a term we use to describe the over brewing of coffee. Some of the solubles in coffee add a bitter, drying finish to the cup. Grinding too fine, or brewing for too long can result in overextraction.
In addition, if you have ground the coffee too fine, you will likely see more of a muddy residue in the bottom of the cup. More finer particles have managed to find their way through the mesh of the coffee press.
If you have ground the coffee too coarse you might experience underextraction.
An underextracted coffee is where we have failed to dissolve enough solids into the water. The resulting character of the cup be described as sharp or sour, thin (no body) and lacking in length or finish.
If coffee particles are too big the water cannot penetrate during the brewing time.
Often the best way to determine whether your grind setting is correct is through taste. A balanced coffee should have acidity, sweetness and bitterness (caffeine is bitter) in varying degrees, without any one dominating the cup. I think it should also have length; in other words the flavour should linger for some time afterwards.
Water Temperature

We generally brew coffee in a temperature range between 93º and 97º celsius. However, it is important to realise that these figures relate to the temperature of the water in contact with the coffee. The process of pouring water into your cafetiere reduces the temperature more than you would think.
We put this to the test: we poured water at 100ºC onto the coffee with a thermometer placed about half way into the cafetiere. By the time we had finished pouring the water (500ml), the temperature had dropped to 94º (we had previously pre-warmed the cafetiere).
By the time the brew cycle had finished (4 minutes), the temperature had dropped to 91º.
So the best approach you can take with regards to water temperature is pre-heat the cafetiere and use boiling water to maximise extraction.
Brew Time
Brew time throws an additional variable into the mix! The typical brew time for a cafetiere is between 3 and 5 minutes. The brew time controls extraction in much the same way as the grind setting. When I brew a cafetiere I always go for a fixed brew time of 4 minutes, it makes life simpler and takes another variable out of the question. I then adjust the extraction by altering the grind setting.
If you buy pre-ground coffee, you do not have the luxury of tweaking your grind setting so you will have to use the brew time to control extraction. If your coffee is tasting weak, thin, sharp and lacks finish then you need a longer brew time. Conversely, aim for a shorter brew time if you have a bitter, drying finish to the coffee.
The Method
The method of making a cafetiere is quite straight forwards:
- Pour your ground coffee into the cafetiere and then add the appropriate amount of water.
- Stir thoroughly to make sure the grounds are fully saturated and then start the timer.
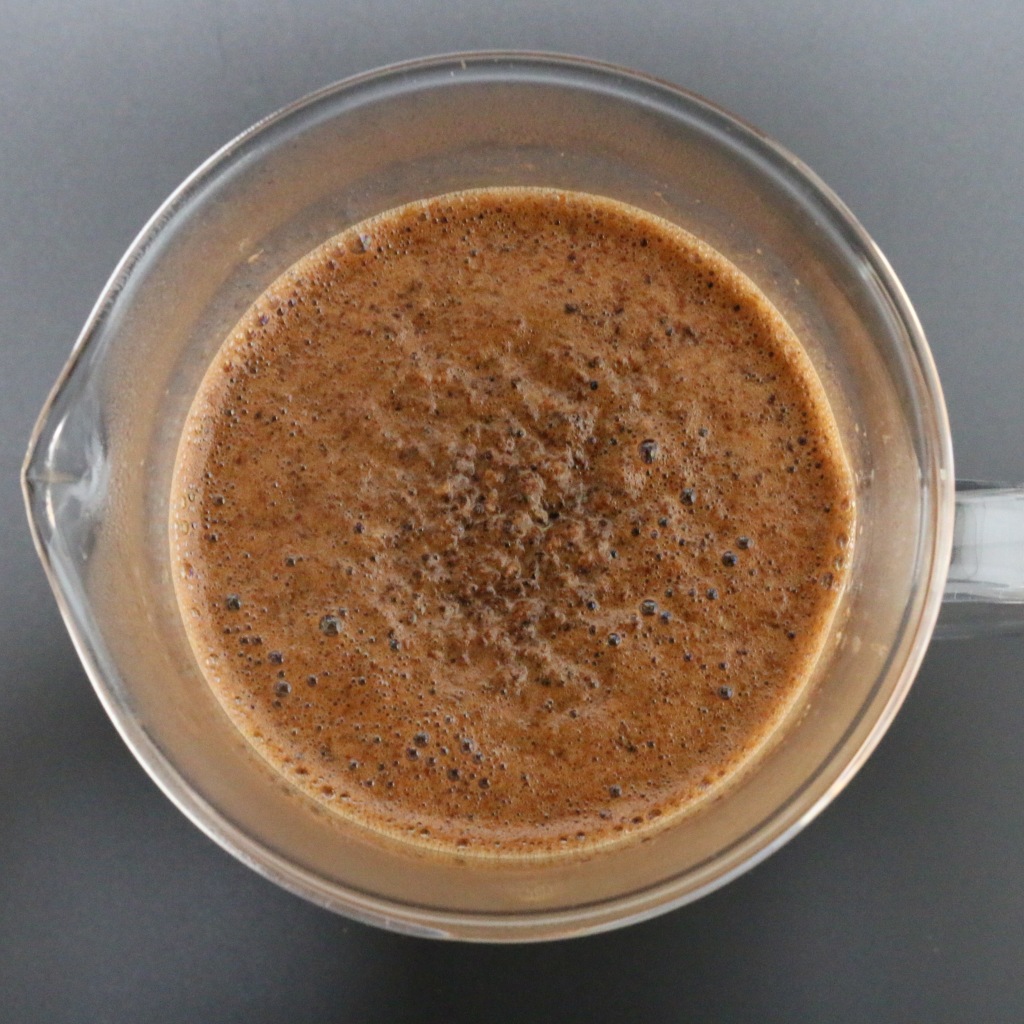
You will likely notice a ‘bloom’ of coffee appearing at the top. This is a floating bed of coffee, along with gases, which are released when water comes into contact with the coffee. - When you reach the desired time, you need to break the ‘crust’. To do this gently press down on the floating bed of coffee with the back of a spoon. This will release the gases and the coffee grinds will sink, usually leaving a foamy residue on top.
- Using a spoon, remove this foam from the top of the coffee.
- If you have the patience, let the cafetiere stand for a while, maybe 2 minutes. Much of the sediment will settle into the bottom, resulting in a cleaner brew.
- Now you are ready to plunge! You should find it easy to plunge the cafetiere as you have removed that floating bed of grinds. Take it slowly and don’t go all the way down to the bottom. Leave a gap before you reach the coffee.
- You really want to drink a cafetiere straight away. If you have brewed more than you need you could decant it into a thermos flask to save until later.
We’re happy to receive your thoughts and comments with regards to brewing by cafetiere, or any coffee brewing method for that matter.